A Few Tips to Keep Your Fake Red Hair from Fading

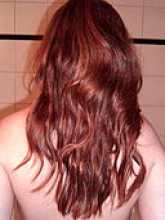
Anyone that dyes their hair red knows that it is a huge pain to keep the color. While all dyed hair does fade a bit, red hair is notorious for fading fast. Red color molecules are larger than other color molecules. That means that they escape from the hair shaft more quickly. Try a few of my tips to keep your red looking vibrant.

Protein Filler

Using protein filler is one of the best things that you can do to keep your hair color from fading. It also works well to make the color take evenly. Protein filler neutralizes the porosity in your hair which is responsible for making the color take evenly and take longer to fade. After touching up your roots, add two oz. protein filler to the color, shake it up and apply to the rest of the hair. Look for protein filler at beauty supply stores or online.

Dry Shampoo

Dry shampoo is a handy tool for all fake redheads. The advice given by most hair professionals is to wash your hair less often when you have colored. But, a greasy scalp is no bueno, especially for me. I wash my hair every other day and use dry shampoo in between.

Color Depositing Conditioner

Color depositing conditioner adds just a touch of color to your hair so that it keeps it from fading so fast. Dyed redheads should try to use it at least twice per week. Make sure to leave it on for at least three minutes.

Avoid Box Dyes

I know that box color can work for many people. However, having used both box dye and hair dye from beauty supply stores, such as professional Wella and Ion color, there is just no comparison. If you don’t have access to such a store, you can buy it online as well.

Redheads especially should try to get their hands on the good stuff. Buying the hair dye, plus developer is actually way cheaper than buying boxed color. My personal favorite, as a fake redhead, is Wella. You can even experiment by mixing two or more colors together.
The Cost of Foundation

I have not used a drug store brand foundation in over 5 years.  I am not saying that good ones don't exist, but sometimes in this case you do get what you pay for.  (For the record I am not a makeup snob, I love cosmetics from both high and low ends of the earth.)  When you buy a $5-$10 foundation every other month, the cost stacks up. You end up using much more than if you found a match that you really loved. I had a makeover a few years ago at a Lancome counter.  My skin was a mess at the time and I sat down and listened to suggestions for skin care.  When I left that day I bought some of the products they reviewed with me, but most importantly that day they sent me home with a sample of foundation that changed me.  I used the sample and had to have it within a week. I have been in it ever since, and have no plans of changing in the near future.  I get funny looks when I tell people that the foundation cost $42, but in all honesty I get 10 months out of it, and would have a hard time finding something similar.
The one thing I wanted to get across in this article is that almost all of the large department store lines will sample you foundation FREE for 10 days.  Don't be afraid to go to the counter and ask to be matched up, it gives you a large enough sample to work with it at home and see if color wise, and consistency wise this is a good place for you to start.  If that doesn't work, move on and try something different. As a beauty advisor I loved finding the perfect foundation for someone, and I knew when they came back I had done my job right.  Take advantage of this service, your skin will truly thank you!

The Perfect Foundation

"There really is something out there for everyone. It is not worth being unhappy with your skin."

There are some women born with beautiful, even, and flawless skin. I have never been one of those lucky ladies, and for a long time the search for the perfect coverage foundation was a very frustrating experience.  I have worn liquid foundation for about 15 years, and though I love my mineral makeup, I could swirl, tap, and buff all day and not get a full coverage look.

So where to start? You truly have to have a little bit of an idea as far as coverage goes, what you would like.  When I do makeovers I tend to keep the younger aged girls with good complexion in something sheer and water based, or a nice tinted moisturizer.   Younger girls prone to acne I love a good matte foundation with full coverage.  Most (not all) matte foundations are oil free.  For about 75%  of us out here, we don't want an oily foundation!  When age starts to come into play we usually move you up into a line for dry skin to help replenish moisture loss and keep you from getting cakey.  Most cosmetic lines have a foundation targeted to lift and firm wrinkles throughout the day as well.  Somewhere in the middle? Look for a nice moderate coverage balancing foundation.  The type of skin you have, is more important than the type of skin you want.

Another thing you might want to watch for is SPF. Tinted moisturizers which don't cover a whole lot, but are very easy, usually have a higher SPF. Your typical foundation will have an SPF of 15-20.  Many of the age repair foundations are now being made with a little bit of a higher protection built in.  If you are sensitive or have had issues in the past with liquid foundation, you may actually be allergic to SPF.  (You will notice the same kind of reaction if you wear a balm on your lips that has the SPF in it as well.) Some of the specialty lines like Clinique may be just what you need, no dyes, no scent. Clinique also caters to those with Acne and Rosacea. There is a line of skincare and foundation now.  (Acne Solutions, and Redness Solutions) The Redness Solutions line is perfect for toning down the red.

There really is something out there for everyone. It is not worth being unhappy with your skin. Finding the right foundation for me really made me more confident, and when people tell me I have beautiful skin I just laugh now. Little do they know I am wearing foundation!


Candy Cane Lane

I love Philosophy brand beauty products.

Urban Outfitters has three collections representing Philosophy brand beauty products featured in their product list for this year. My favorite is Candy Cane Lane. The price is right at a scant 22 dollars. As stated on the label, this set is “a merry blend of red and white”. This wonderful collection includes three products. These are # 1: 3-in-1 peppermint scented shampoo, bubble bath and shower gel. # 2: super skin drenching peppermint scented body lotion infused with shea butter. # 3: A high intensity, high shine lip gloss with this phrase stated on the label: “may you find yourself smiling with cheer”.

As with all Philosophy products; this gift collection promises a cheerful disposition based on the philosophy behind Candy Cane Lane. I would recommend this lovely gift collection for not only Christmas, but all winter long.

My loyalty to Philosophy brand products has run thick for many years. Though Christmas is over now, I remember nine years ago, there was a present for me with a gorgeous blue bow under the tree. The wrapping paper unveiled a Philosophy gingerbread collection gift set. This was, by far, my favorite present under the tree that year.

Upon receiving my own Philosophy gift, I delighted in taking a shower and coming out smelling like steamy, freshly baked gingerbread for months.

Urban Outfitters is featuring free shipping on orders over 50 dollars, plus 20% off any regular full priced item. Enter: snowday into the coupon section while checking out.

New Year's Day Hangover Beauty Tips (to the Rescue)

Rest easy because several methods are available for you to choose from to erase the signs of a bothersome hangover.

You had a blast at last night's New Year's Eve bash by celebrating solo with friends, snuggling with a long time beau or with a sexy new guy. Either way, you enjoyed a few glasses of champagne while waiting for midnight to roll around. It's now mid-morning, the next day, you note by casting a quick glance to the clock as you climb out of bed. You glance at the mirror and groan at the women staring back at you. Hangovers are not a pretty site but you have no idea how to fix the problem. Rest easy because several methods are available for you to choose from to erase the signs of a bothersome hangover.


Wash your face with a couple splashes of cold water. Doing this step will aid you in temporarily fixing the puffiness that shows up after a long night of drinking and partying.


Rehydrate your skin, both inside and out. Your body will thank you for it because alcohol causes you to lose the water in your system, leaving your skin looking like you have a cold or took a long plane ride. Drink water or Gatorade to replace the lost moisture and make your skin appear more alive.


Moisturize your face to help you combat the dryness caused by drinking. Apply a moisturizer that has some color in it to make your face appear more awake.


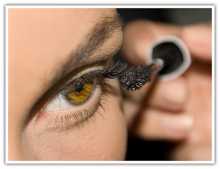
Apply pink eyeshadow or blush for the purposes of waking up your face. Reduce a tired appearance even more by dabbing a white or pale shadow on the inner corners of your eyes. Add a few coats of mascara to liven up your eyes.


Using these beauty hangover cures will get you up and out the door for a New Years Day breakfast or brunch in no time.

Tips for Wearing Red Lipstick

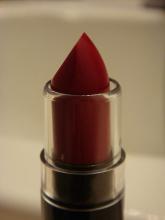
Red lipstick can be scary. Many women feel that they can’t wear it but that really isn’t the case. It’s true that it isn’t very forgiving. Red lipstick can draw attention to thin lips and bleed onto your skin and teeth. Those of us with red and ruddy skin tones should probably avoid it. But, other lovely ladies should experiment a bit and will likely find a good match.

Red lipstick it is also a bold and retro look that can make you feel like a sultry pinup siren. They key is just to take a few steps to make it work on your face and keep it looking good throughout the day.

Shade

The most crucial part of wearing red lipstick is to wear the right shade. Otherwise, it will just not flatter you. While there are no absolutes, there are a few guidelines to follow. If you have dark or tan skin, stick with burgundy and brick red tones. Olive-skinned women should lean more towards bright reds with an orange base. Fair skinned ladies tend to look best in crimson, true reds.

Lips

You can wear red lipstick if you have thin lips or don’t like your lip shape. Just keep in mind that it will highlight that. Red lipstick will focus all of the attention on your lips. If your lips tend to be thin, outline them with a nude lip pencil before applying the lipstick. Don’t use a red lip pencil as it will look two-toned with the lipstick.

Makeup

Avoid pairing red lipstick with your favorite purple eye shadow. Channel that vintage look and keep the rest of your face neutral. Make sure that your complexion looks perfect by using some form of foundation and powder. Just swipe on some black mascara and sport your red lipstick for a classic and elegant look. 

Let the Pros Deal with Unwanted Facial Hair

The redness will go away.........eventually.


Note to self. Let the pros deal with unwanted facial hair. I learned my lesson the first time in 2008 when I tried Nair on my upper lip. Not a pretty sight. Clown lips and a big frown ensued after I left the Nair on too long. 

Today wasn’t any better. I tried the inexplicably-named Nads to remove my unwanted facial hair. It seemed too easy: rub the wax strips together, place on face, and rip off the hair from my upper lip. 


I ripped and it felt like it hurt, which I took as a good sign. I continued on my beauty routine. Ten minutes later, I looked in the mirror and my upper lip was red. Not on both sides. Just one. 


Lovely. Absolutely gorgeous. In my new and improved single status, I am sure to woo any guys that I might go out with. Instead of noticing my charming personality and quick wit, they will be distracted by the red between my nose and my lip. They will stare at it, wondering what sort of self-flagellation I did to get it there. 


It will ruin my entire life. The moustache would have been preferable. The only saving grace about the whole moustache-red lip incident is that I am not friends with the pseudo friend that I was before who would have reminded me at every opportunity of my resemblance to a clown. 


Of course, the red will fade away. Just like the bad hair cut I had before grew out. Just like the red lip I had before faded away. And just like my eyelashes grew out when I had a psycho woman do my brows. And if anyone is really so distracted by my red lip, I guess there’s nothing I can do about it anyway. 


Some women have more serious problems. I do, too, but I don’t choose to share them for the world’s (or my limited readership’s) entertainment. Nor do I intend to share the truthful tragedies of my family and friends so small-minded people can feel better about themselves. 


As I’ve survived everything else, I will survive this, too. Unfortunately for those around me, I’m not going to choose to be an Agoraphobic because of the unfortunate incident with the waxing strip. I’m proud that I tried to save myself a little money and have enough cover-up to hide my obvious mistake. 


How about you? Have you suffered any beauty injuries? 

Create a Supermodel Glow with Sunless Tanner

Part of the appeal of the supermodel is glowing, even toned skin. Supermodels have a whole slew of staff to make them look gorgeous and give them that glowing skin. While you don’t have the staff at home, it’s still possible to get a lovely glow to your skin. It just takes a bit of preparation, sunless tanner, and body oil.

Exfoliate

Exfoliating your skin is crucial for removing dead skin cells. If you don’t exfoliate before applying sunless tanner, it will look clumpy and fade unevenly. Exfoliate your body in the shower using a body scrub and washcloth. Make sure to continue to exfoliate at least twice per week when using sunless tanner.

Self Tan

Use a sunless tanner that suits your skin type and tone. If you are very fair, run screaming from the darker formulas lest you turn bright orange. Dry skin types should stick with creams and lotions while oily skin can tolerate sprays and mousses.

Before applying it, put some body lotion on your feet, ankles, wrists, back of the hands, knees and elbows. These are areas that can tend to streak and turn orange. Let it sink in for a few minutes and then apply the tanner. Always wear gloves to apply sunless tanner, no exceptions!

Body Oil

Getting that supermodel glow involves making the skin look shimmery and glowing. In addition to self tanner, add a touch of body glow to make you look glowing and slim. Only a dab will do. If you use more, it will look as though you fell into an oil slick.

While using sunless tanner won’t instantly turn you into a supermodel, you can feel superhot simply sashaying down the aisle at the grocery store!

How to Apply Festive Holiday Eyeshadow

"Purchase or use shadow you have on hand in violet if you have brown eyes, bronze if your peepers are blue and a taupe shade if your eyes are green."

I have learned that one of the neat ways to make my eyes stand out without appearing dramatic is to apply eye shadow that's the opposite of my eye color. The woman's magazine “All You” backs me up in an article titled “Pump Up Your Holiday Makeup.” The writer for “All You” indicates that applying eye shadow, in a shade that contrasts the color of your eyes, allows others to focus on that area of your face.


Things You'll Need:

Contrasting eyeshadow

Black or brown eye liner

Black mascara


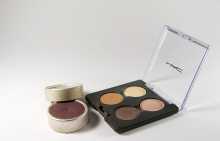
Purchase or use shadow you have on hand in violet if you have brown eyes, bronze if your peepers are blue and a taupe shade if your eyes are green. Another idea is to search through the eye shadow at drug stores as they often display packs for sale that contain eye shadow shades that match your eyes. Directions are listed on the package about how to apply the various shades.


“All You” recommends applying a medium shade of the shadow on your lids first. Add a shade of a darker color on the top and bottom of your lash line. Place the same shadow hue on the inner corners and outer corners of the creases. Don't forget to blend the shadow to create the appearance of a shadow ring around each eye.


Line your eyes with black or brown liner, but realize that you don't need loads of liner to make this creation work.


Finish off with two coats of mascara on your upper and lower lashes.


How to Wear Red LIps for the Holiday Season

Red lips are showing up everywhere this holiday season and I myself, a person who tends to shy away from bold lipstick, am putting on a long-lasting version when I'm feeling daring and adventurous. For the longest time I had no idea which shade worked for me and how to apply the lipstick without smearing it all over the place. With the long-lasting version I had to get it right or the lipstick would smear and take forever to get off my skin. You too, can wear red lipstick with confidence throughout the holidays.


Pick the right hue that compliments your skin tone. Many women have trouble determining which color works the best with their appearance. O, the Oprah Magazine recommends placing several shades on your fingertips while you're at the department store. Hold the different colors up to your face one by one until you see the shade that makes your eyes shine and does not enhance any redness in your cheeks.

Outline your lips using a nude pencil because it's almost impossible to match the liner with the lipstick unless they come together packaged in the same container.


Apply a small amount of balm to your lips to moisten them but avoid slathering on too much or your lipstick won't stick to your lips.


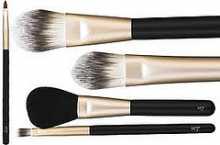
Locate a makeup brush and apply the lipstick using this tool because you wind up with a more precise application than putting in on straight from the tube.


Keep the rest of your makeup subtle to avoid winding up with too much color on your face. Define your brows and add two coats of mascara to finish off the look.


Add a high shine gloss to your lips if you want to make them appear plumper. Use a lip brush to apply a small amount to the middle of your lower lip. Dip your brush into a highlighting powder and apply to the area where your upper lip parts in the middle. Blend it in for the purpose of creating a natural, plumping effect.


Pages